Pipe Inspection
Pipe Inspection is a continuous process during manufacturing. Different types of inspection and testing are performed
- Metallurgical
- Destructive
- Hydro Test
- NDT
- Visual
- Dimension
- Marking
Product Analysis – Chemical & Mechanical Testing of Pipe
Metallurgical Tests
Metallurgical Tests confirm that the chemical requirements of pipe are as per the material standard.
- Metallurgical Tests are normally known as Micro and Macro pipe inspection & testing.
- Micro Analysis or Chemical Analysis of
- Raw material
- Product
- Weld ensures that all the alloying elements are within the range as specified in the material standard
- Macro Analysis for Weld will check the proper fusion of weld material with pipe material.
There are some Special pipe inspection tests also carried out on the material when it is going to be used in aggressive environments. These tests will ensure that pipe material is able to withstand in such aggressive environments also. Some of the tests are
- Grain size (AS & SS)
- IGC- Intergranular Corrosion Test(SS)
- Ferrite (SS)
- HIC- Hydrogen-induced Cracking
- SSC- Sulfide Stress Corrosion Cracking
These tests are performed when it is asked by the purchaser in his specification.
Destructive test
The mechanical / Destructive test of pipe inspection confirms the mechanical requirements of pipe are as per the material standard.
In Destructive Testing- a sample from the pipe is cut to performed tests
- The tensile test is done to check the yield and ultimate tensile of the pipe. If required by the purchaser or by standard high or low-temperature tensile tests are also performed.
- Bend test / Guided bend test is used to check the integrity of weld joint
- Flattening test examines the ability of plastic deformation in a pipe
- Impact test / Charpy V-Notch Test, check the ability of a material to withstand under low-temperature conditions
- Creep test is done to check the long term effect of temperature under constant load.

Pipe Inspection – Hydro Test, NDT, Visual and Dimension
To ensure product quality, during and after the production certain pipe inspection and non-destructive testing are performed on the body & weld of the pipe. These pipe inspection will check whether any physical defects are present in the pipe/weld, which may affect its performance during the service. These testing are
- Flux leakage examination or Magnetic flaw detection
- Eddy current
- Ultrasonic – can be done on full body or only for weld seam
- Radiography (Only for Weld)
- Magnetic particle test for pipe ends & weld seam
- Positive Material Identification.
Hydrotest of Pipe
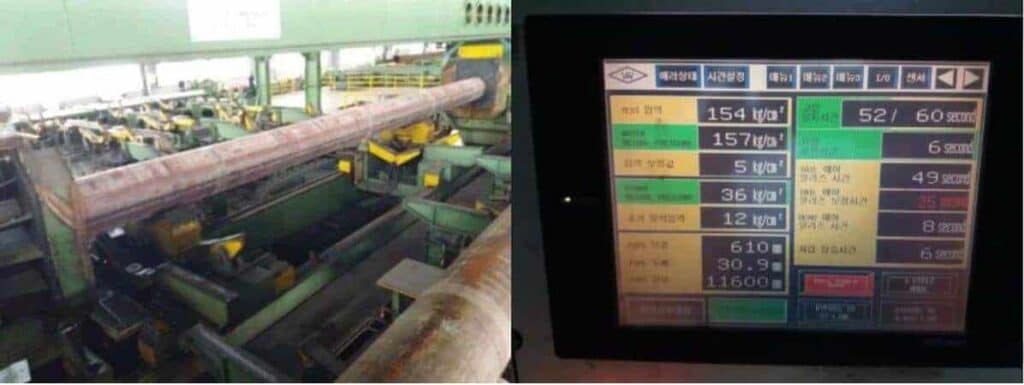
Hydrostatic Test or Hydrotest of a pipe is carried out to
- Ensure that pipe is 100% leak proof
- It also ensures the ability of the pipe to withstand under pressure
- Hydro test pressure is calculated based on equation given in ASTM A530,
P = 2St/D or S = PD/2t
- P = hydrostatic test pressure in psi or Mpa,
- S = pipe wall stress in psi or Mpa,
- t = specified nominal wall thickness, nominal wall thickness corresponding to specified ANSI schedule number, or 1.143 times the specified minimal wall thickness, in. [mm], and
- D = specified outside diameter, outside diameter corresponding to specified ANSI pipe size, or outside diameter calculated by adding 2t (as defined above) to the specified inside diameter, in. [mm].
Holding time for the hydro test is a minimum of 5 sec as per ASTM A530. The pressure is monitored by the computerizing system. For welded pipe inspection, the test pressure should be held for a time, sufficient to permit the inspector to examine the entire length of the welded seam. A hydrostatic test can be waived under certain conditions as set in the ASTM standard

Pipe Visual Inspection
Visual Inspection is one of the most effective inspection method used to check overall product quality. During the visual inspection, you will check for the overall product finish. You will check for surface imperfections such as mechanical marks, lamination, tears or any other visual imperfections and also check weld defects such as porosity, undercuts, uneven weld bead, and excess or underfill of weld material. Acceptance of these imperfections is as per applicable ASTM standard
Pipe Dimension Inspection
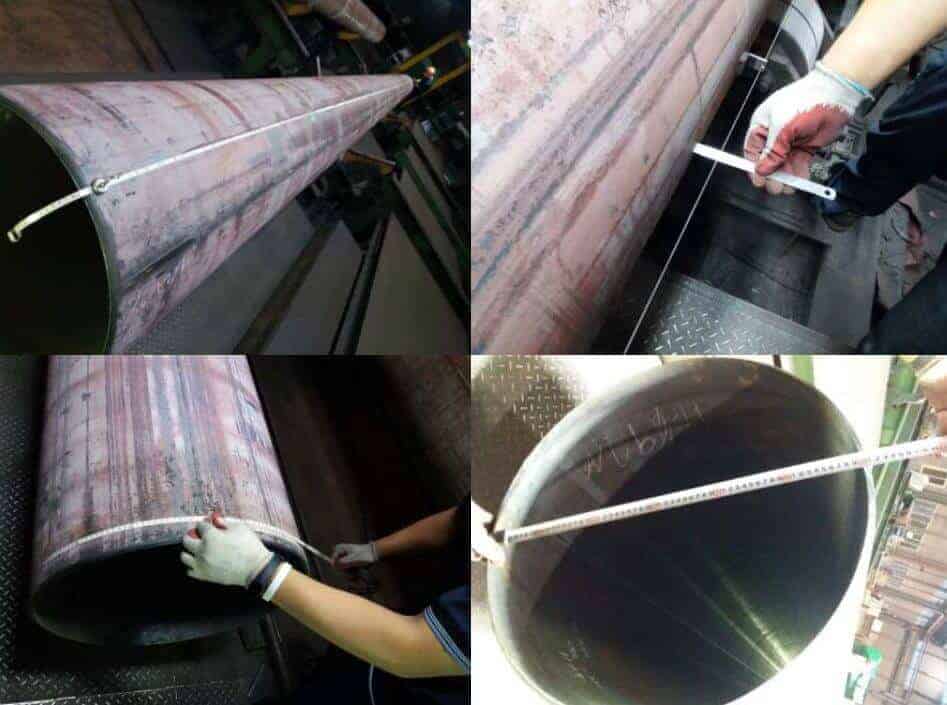
Dimension inspection of the pipe is carried out based on the Dimension Standard, the final dimension of the pipe must confirm the following standard or it should be as specified in the purchaser’s specification.
- For Welded and Seamless Wrought Steel Pipe dimensional requirements are cover in ASME B36.10
- For Stainless Steel Pipe dimensional requirements are cover in ASME B36.19
During a dimensional inspection, following to be confirmed with standard
- Diameter
- Length
- Thickness
- Straightness
- Ovality &
- Weight
Permissible Variations depends on manufacturing standard.

Tolerances for Pipe Outside Diameter
| Nominal Pipe Size | Carbon Steel | Stainless Steel | ||
|---|---|---|---|---|
| NPS | DN | ASTM A53M | ASTM A106M | ASTM A999M |
| ⅛ to 1½ | 6 to 40 | ±0.4 mm | ±0.4 mm | +0.4 / -0.8 mm |
| Over 1½ to 4 | Over 40 to 100 | ±1% | ±0.8 mm | ±0.8 mm |
| Over 4 to 8 | Over 100 to 200 | ±1% | +1.6 / -0.8 mm | +1.6 / -0.8 mm |
| Over 8 to 18 | Over 200 to 450 | ±1% | +2.4 / -0.8 mm | +2.4 / -0.8 mm |
| Over 18 to 26 | Over 450 to 650 | ±1% | +3.2 / -0.8 mm | +3.2 / -0.8 mm |
| Over 26 to 34 | Over 650 to 850 | ±1% | +4.0 / -0.8 mm | +4.0 / -0.8 mm |
| Over 34 to 48 | Over 850 to 1200 | ±1% | +4.8 / -0.8 mm | +4.8 / -0.8 mm |
Tolerances for Pipe Wall Thickness
| Nominal Pipe Size | Carbon Steel | Stainless Steel | |
|---|---|---|---|
| NPS | DN | ASTM A53M & 106M | ASTM A312M |
| 6 to 65 | ⅛ to 2½ | -12.5% minimum (maximum wall thickness limited only by mass) | + 20 / -12.5% |
| 3 to 18, t/D ≤ 5% | 80 to 450, t/D ≤ 5% | + 22.5 / -12.5% | |
| 3 to 18, t/D > 5% | 80 to 450, t/D > 5% | + 15 / -12.5% | |
| 20 and over – welded | 500 and over – welded | + 17.5 / -12.5% | |
| 20 and over – seamless, t/D ≤ 5% | 20 and over – seamless, t/D ≤ 5% | + 22.5 / -12.5% | |
| 20 and over – seamless, t/D > 5% | 20 and over – seamless, t/D > 5% | + 15 / -12.5% | |
| t = nominal wall thickness | D = ordered outside diameter | ||
Tolerances for Pipe Mass/weight
The mass of all carbon steel pipe and seamless stainless steel pipe is limited to +10% and a minus limit that varies depending on size – refer to standards for more details.
Straightness Tolerances for Pipe
The carbon steel pipe standards require only that “the finished pipe shall be reasonably straight”.
ASTM A312M (in ASTM A999M) requires a welded stainless steel pipe to be straight to within 3.2 mm over 3.0 m lengths. Generally, the thumb rule is that 1 mm per meter is acceptable. However, most purchasers clearly specified a maximum acceptable limit for straightness.
Pipe Marking Inspection
Once the pipe is cleared all test and inspection, it is marked as per the standard requirements
- The following shall be marked on the pipe
- Manufacturer logo
- ASTM material code
- Material Grade
- Size
- Thickness- schedule no.
- Length
- Heat No
- Special marking WR for weld repair or NH for the non-hydro tested pipe.
- These Marking can be done by paint or by Hard punching
- For stainless steel, pipe stenciling is also used
Please note that
- For carbon steel no hard-punching below 6 mm thickness
- For stainless steel no hard-punching below 12 mm thickness

Pipe Packing Inspection
To prevent the damage during transportation, pipe ends are covered with a cap. Spider supports at the end of the pipe are also installed in Large diameter pipe to protect the circularity of pipe.

Supplementary Requirements for Pipe Inspection
Supplementary requirements are optional that the purchaser has to specify along with purchase requisition. Mainly these requirements are related to additional testing of the product such as low-temperature tensile, transverse tensile, restriction on Carbon Equivalent, etc.
Each standard lists these requirements at the end of the standard product requirements.
Refer Table for Supplementary requirements of ASTM A106 & ASTM A312,
| ASTM A106 | ASTM A312 |
|---|---|
| Product Analysis | Product Analysis |
| Transverse Tension Test | Transverse Tension Test |
| Flattening Test, standard | Flattening Test |
| Flattening Test, Enhanced | Etching Tests |
| Metal Structure and Etching Test | Radiographic Examination |
| Carbon Equivalent | Stabilizing Heat Treatment |
| Heat Treated Test Specimens | Intergranular Corrosion Test |
| Internal Cleanliness–Government Orders | Minimum Wall Pipe |
| Requirements for Carbon Steel Pipe for Hydrofluoric Acid Alkylation Service | Weld Decay Test |
